When I started this blog I said that I would include different kinds of posts…including craft ideas. This will be my first post of something my hubby and I actually did in our garage. It was one of the first ideas I pinned from Pinterest and it was inspired by the following picture:
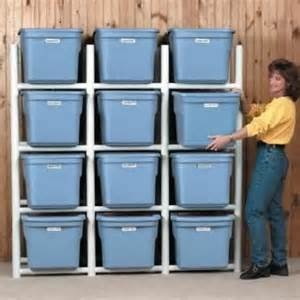
by Studio 5
This seemed like a perfect solution to our problem. We have over 50 totes of various sizes stacked in our garage…most of them holding Christmas decorations. (I go a little crazy at Christmas time.) Anyway, it never failed. Regardless of how we planned, we would always need the tote at the bottom of the stack. At the end of Christmas, we would take extra time and put the totes back in a particular order…knowing how we typically decorate the house. It didn’t matter…we would still need totes at the bottom of the stack. With a system similar to the above, we could access every single tote individually…whenever we needed it.
Now, the above picture looks wonderful because all the totes are the same size (and color). My totes all hold approximately the same capacity (18 gallons), but since they were all purchased at different times and from different manufacturers, they are different colors and their outside dimensions varied. And, even as OCD as I am, I wasn’t about to go out and purchase brand new matching totes. So, I needed to come up with a universal ‘cube’ which accommodated all of my totes. And I did!!
However, I want to explain that the above system is not cheap but it is extremely easy to assemble. Using 3/4″ PVC, the pipe by itself cost under $100 and we ended up with two large completed racks on both sides of our garage. What cost over $400 were the various connectors. Our local Lowe’s and Home Depot did not carry the connectors we needed. They did have alternatives but we calculated that they would cost approximately the same as we would be using two for every one in our design. And we would have been making many more ‘cuts’ in the PVC. We even went to a local plumbing supplier and while they could have gotten us what we needed, it would have cost over double what we paid from our supplier online. I’ll talk more about the connector’s later but search for your connectors online as that will be the cheapest way to go. But, if you aren’t a carpenter or experienced building shelving with wood, this is a comparable alternative to wood shelves.
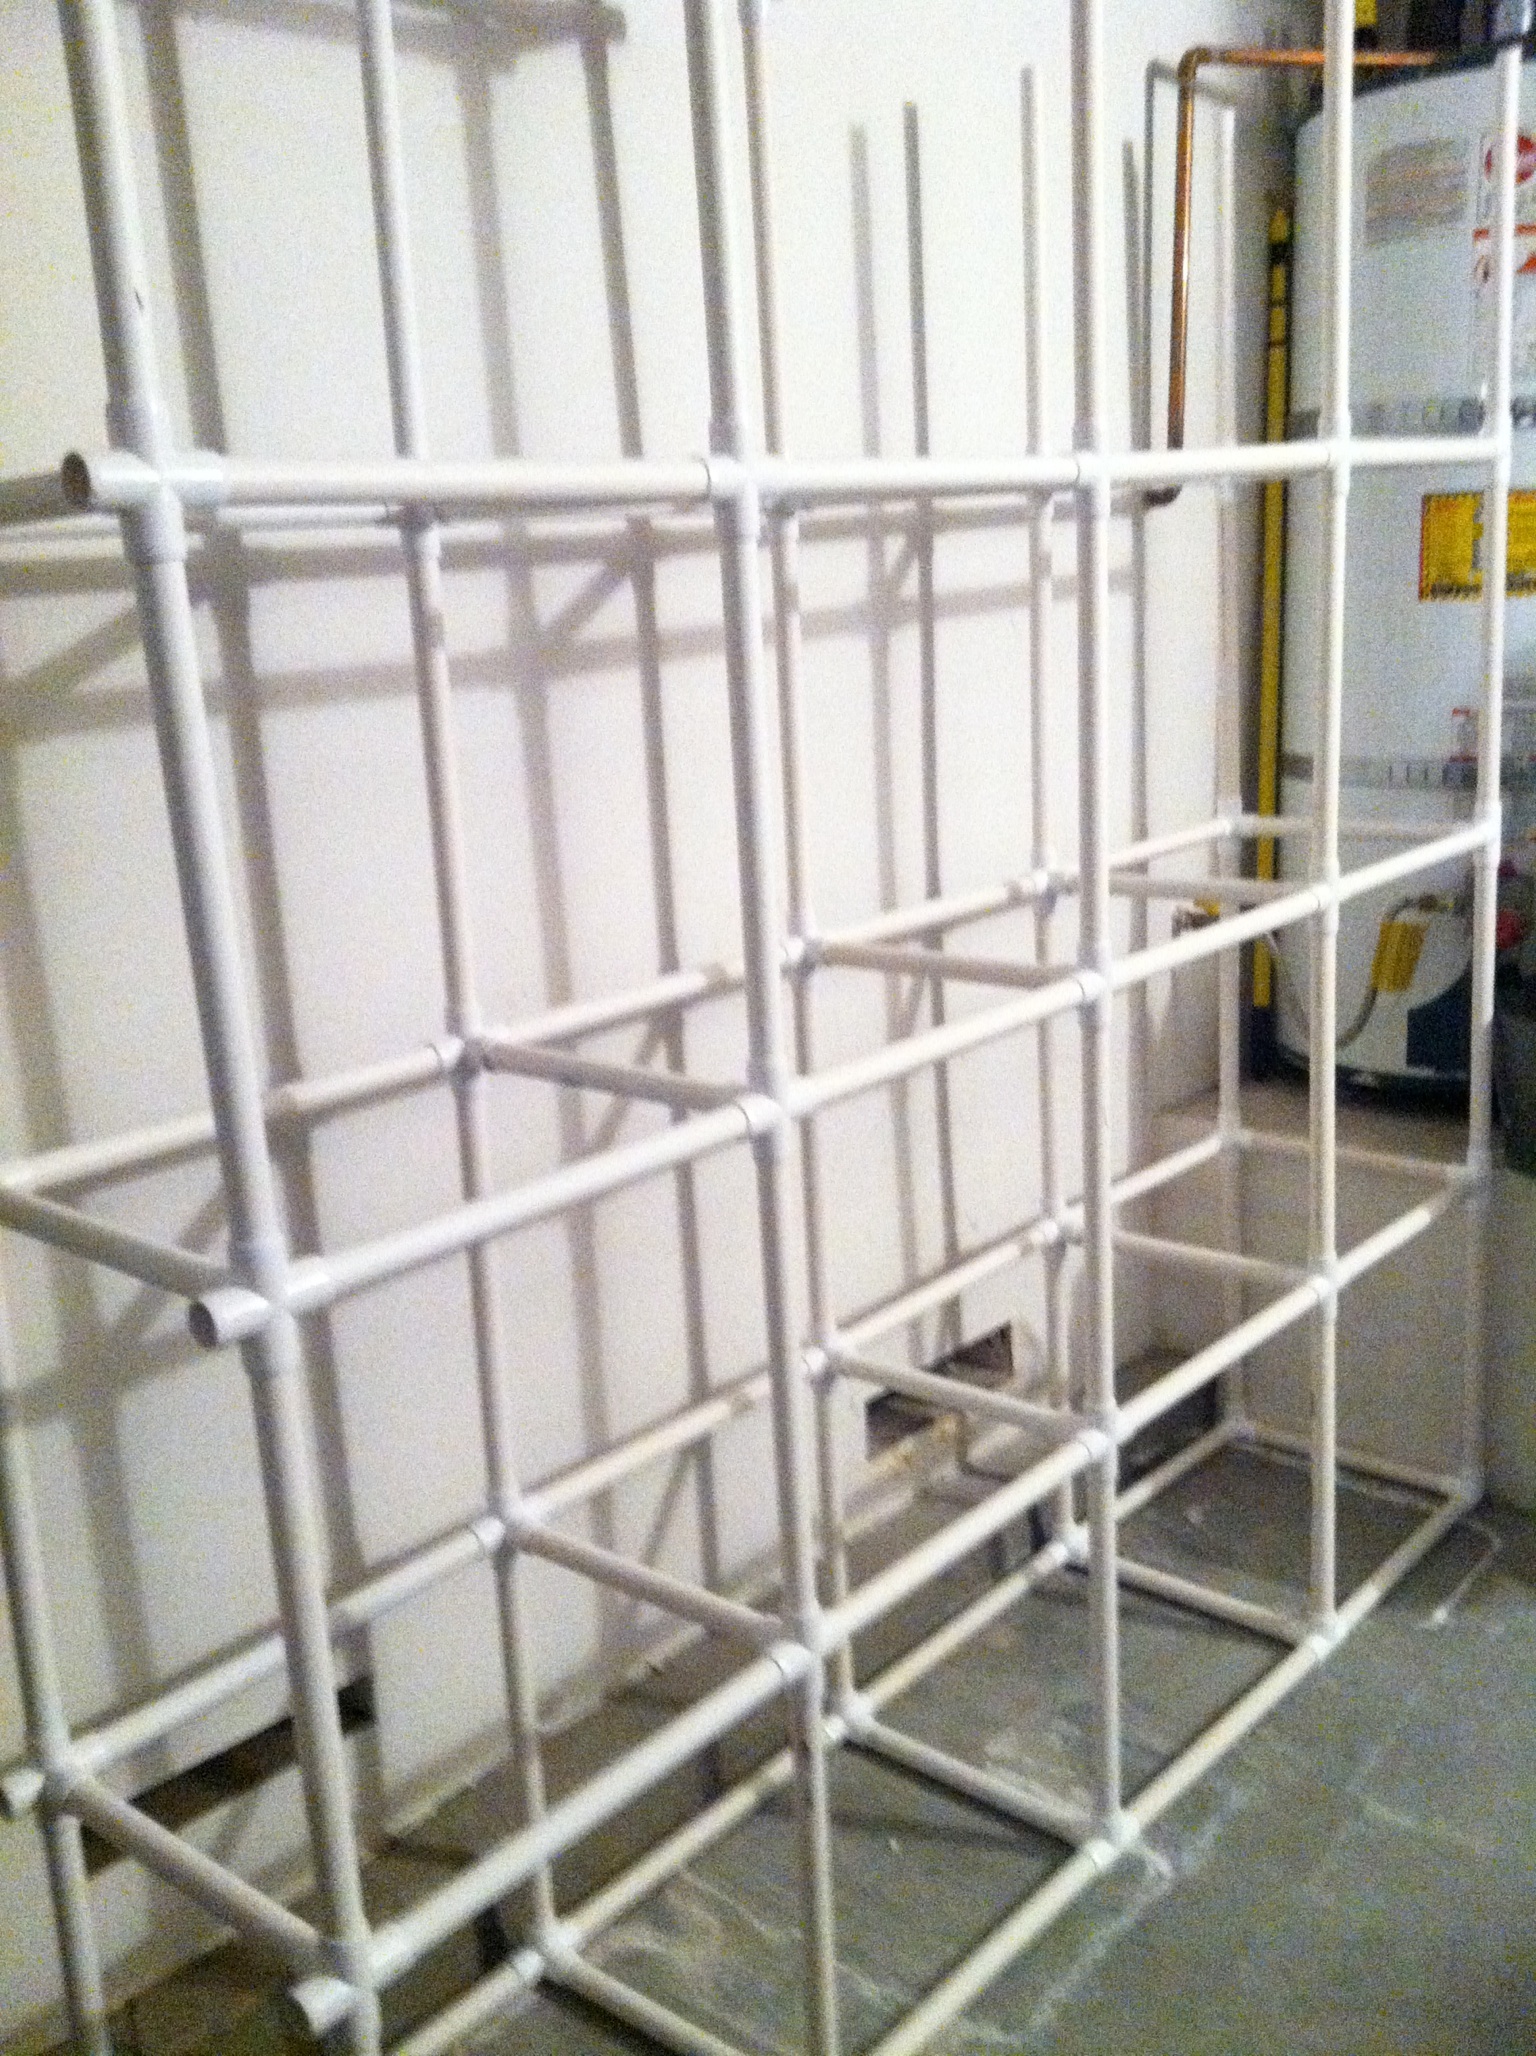
My plan was designed as a cube with a connector in every corner. It was 17″ high by 17″ wide by 13″ deep. The cube is shorter in depth because you want the totes to rest on the bottom edges. Here is a picture of how it started and how it progressed.

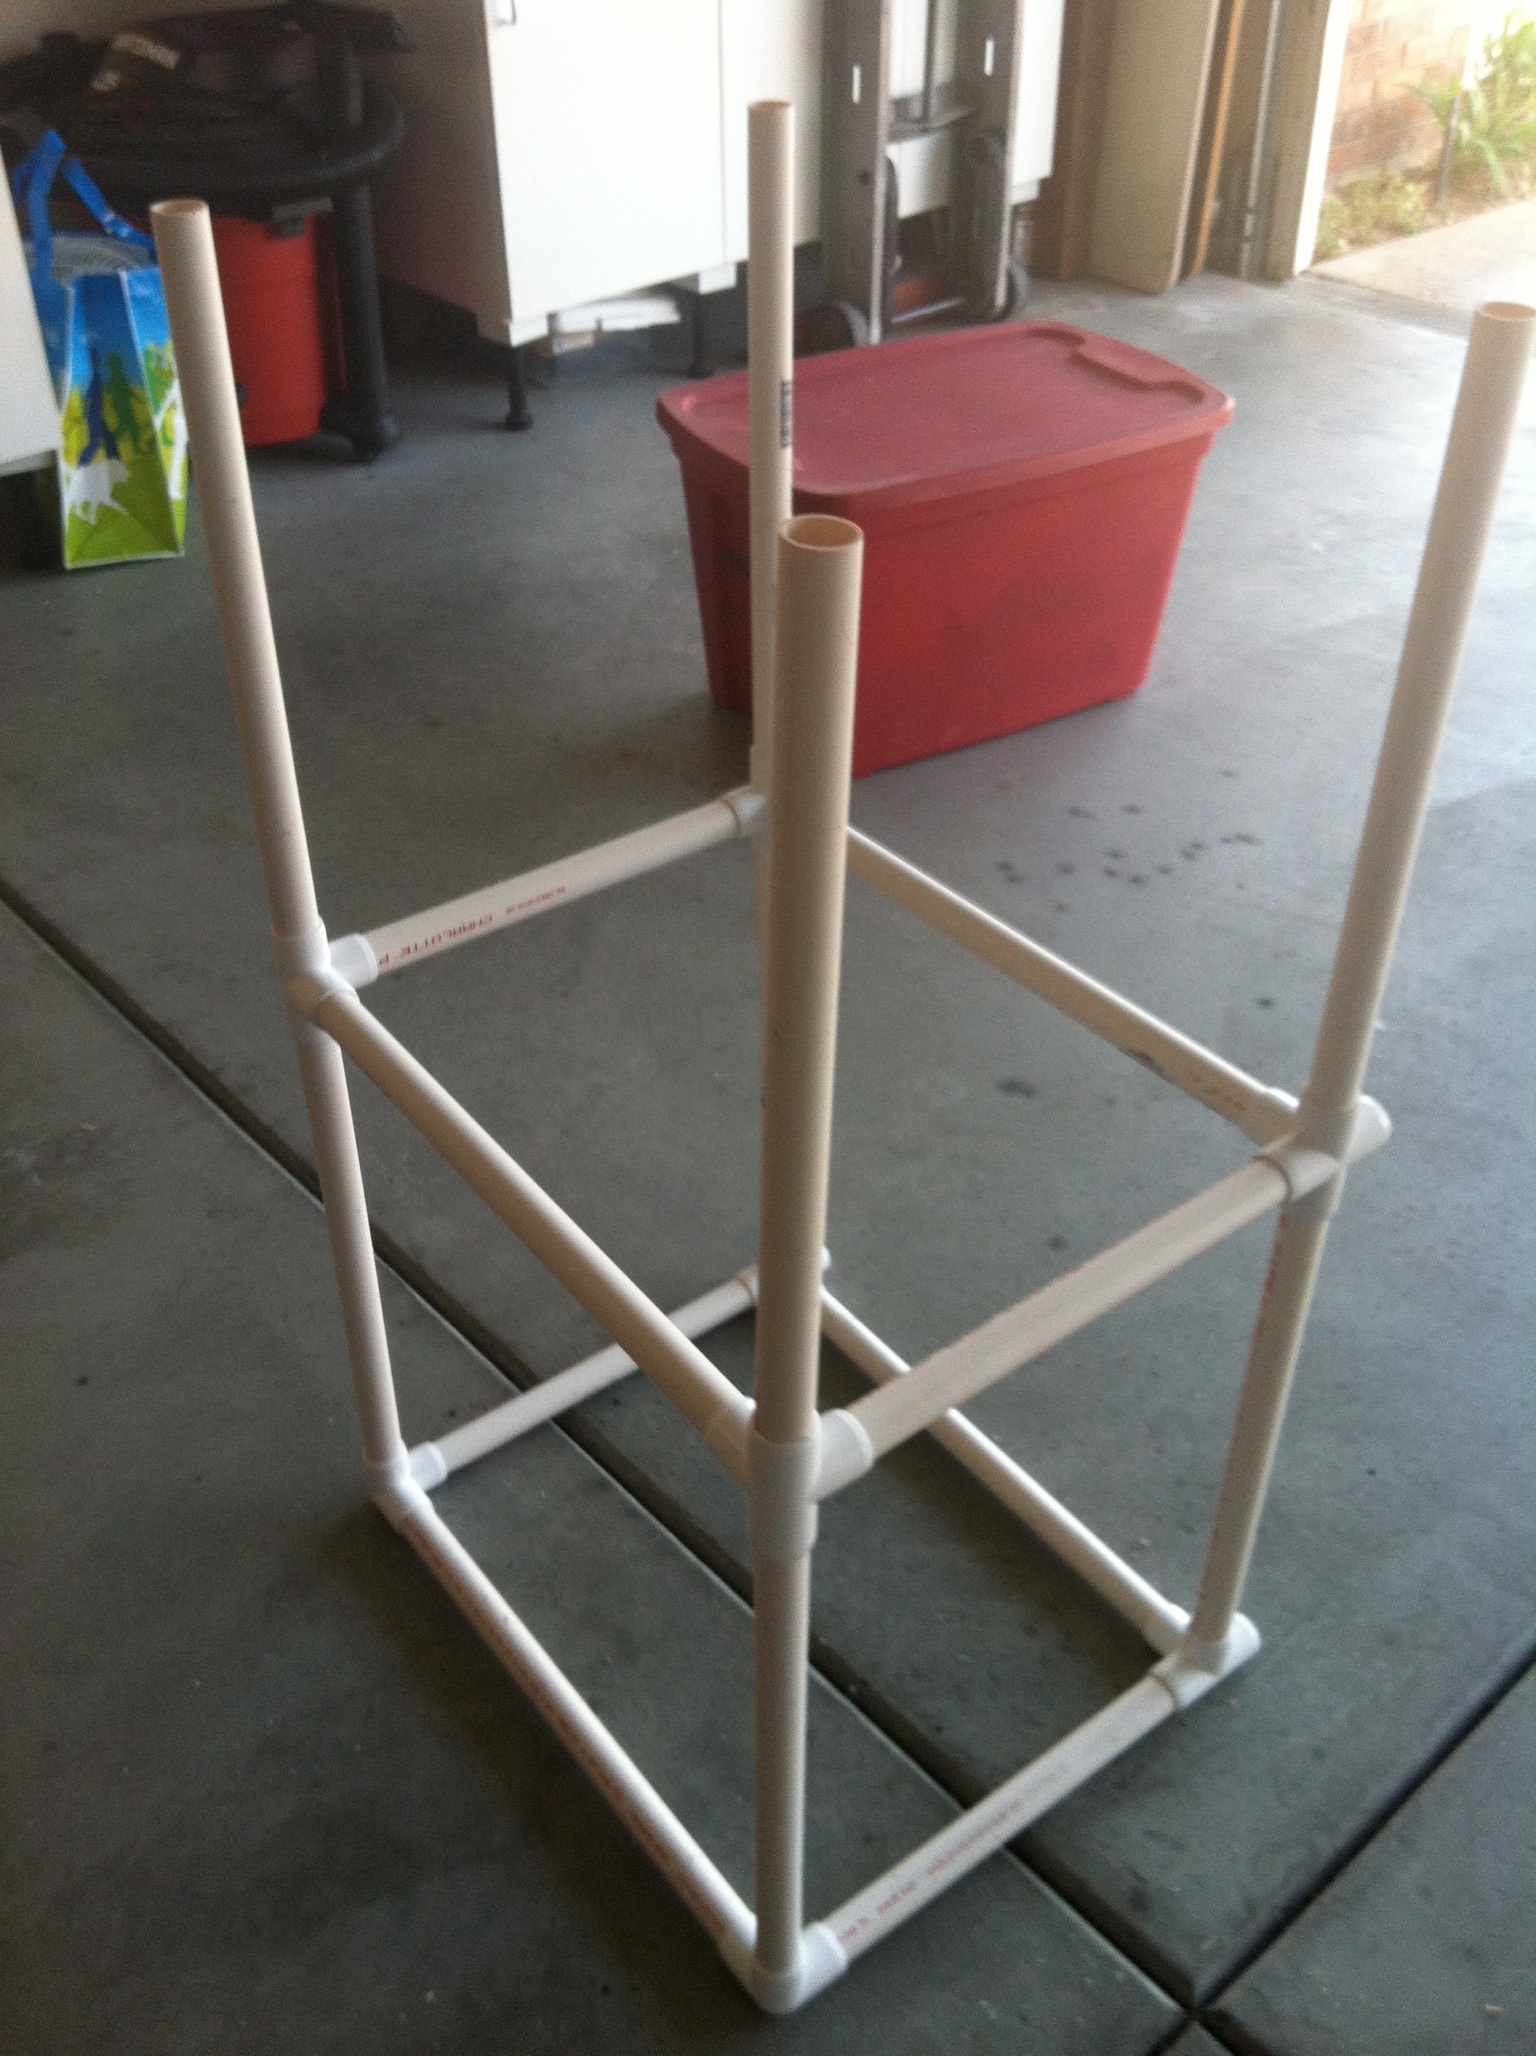
As you can see, there is a connector in every corner. Some are 3-way connectors, some are 4-way and some are 5-way. For me to calculate what I would need, I actually made a diagram on paper and calculated quantities for each one. I had to put it down on paper or I couldn’t visualize it. I would suggest that you do the same. Measure your space and work accordingly.
Here are pictures of what I mean by 3-way, 4-way, and 5-way connectors:
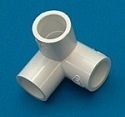

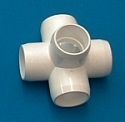
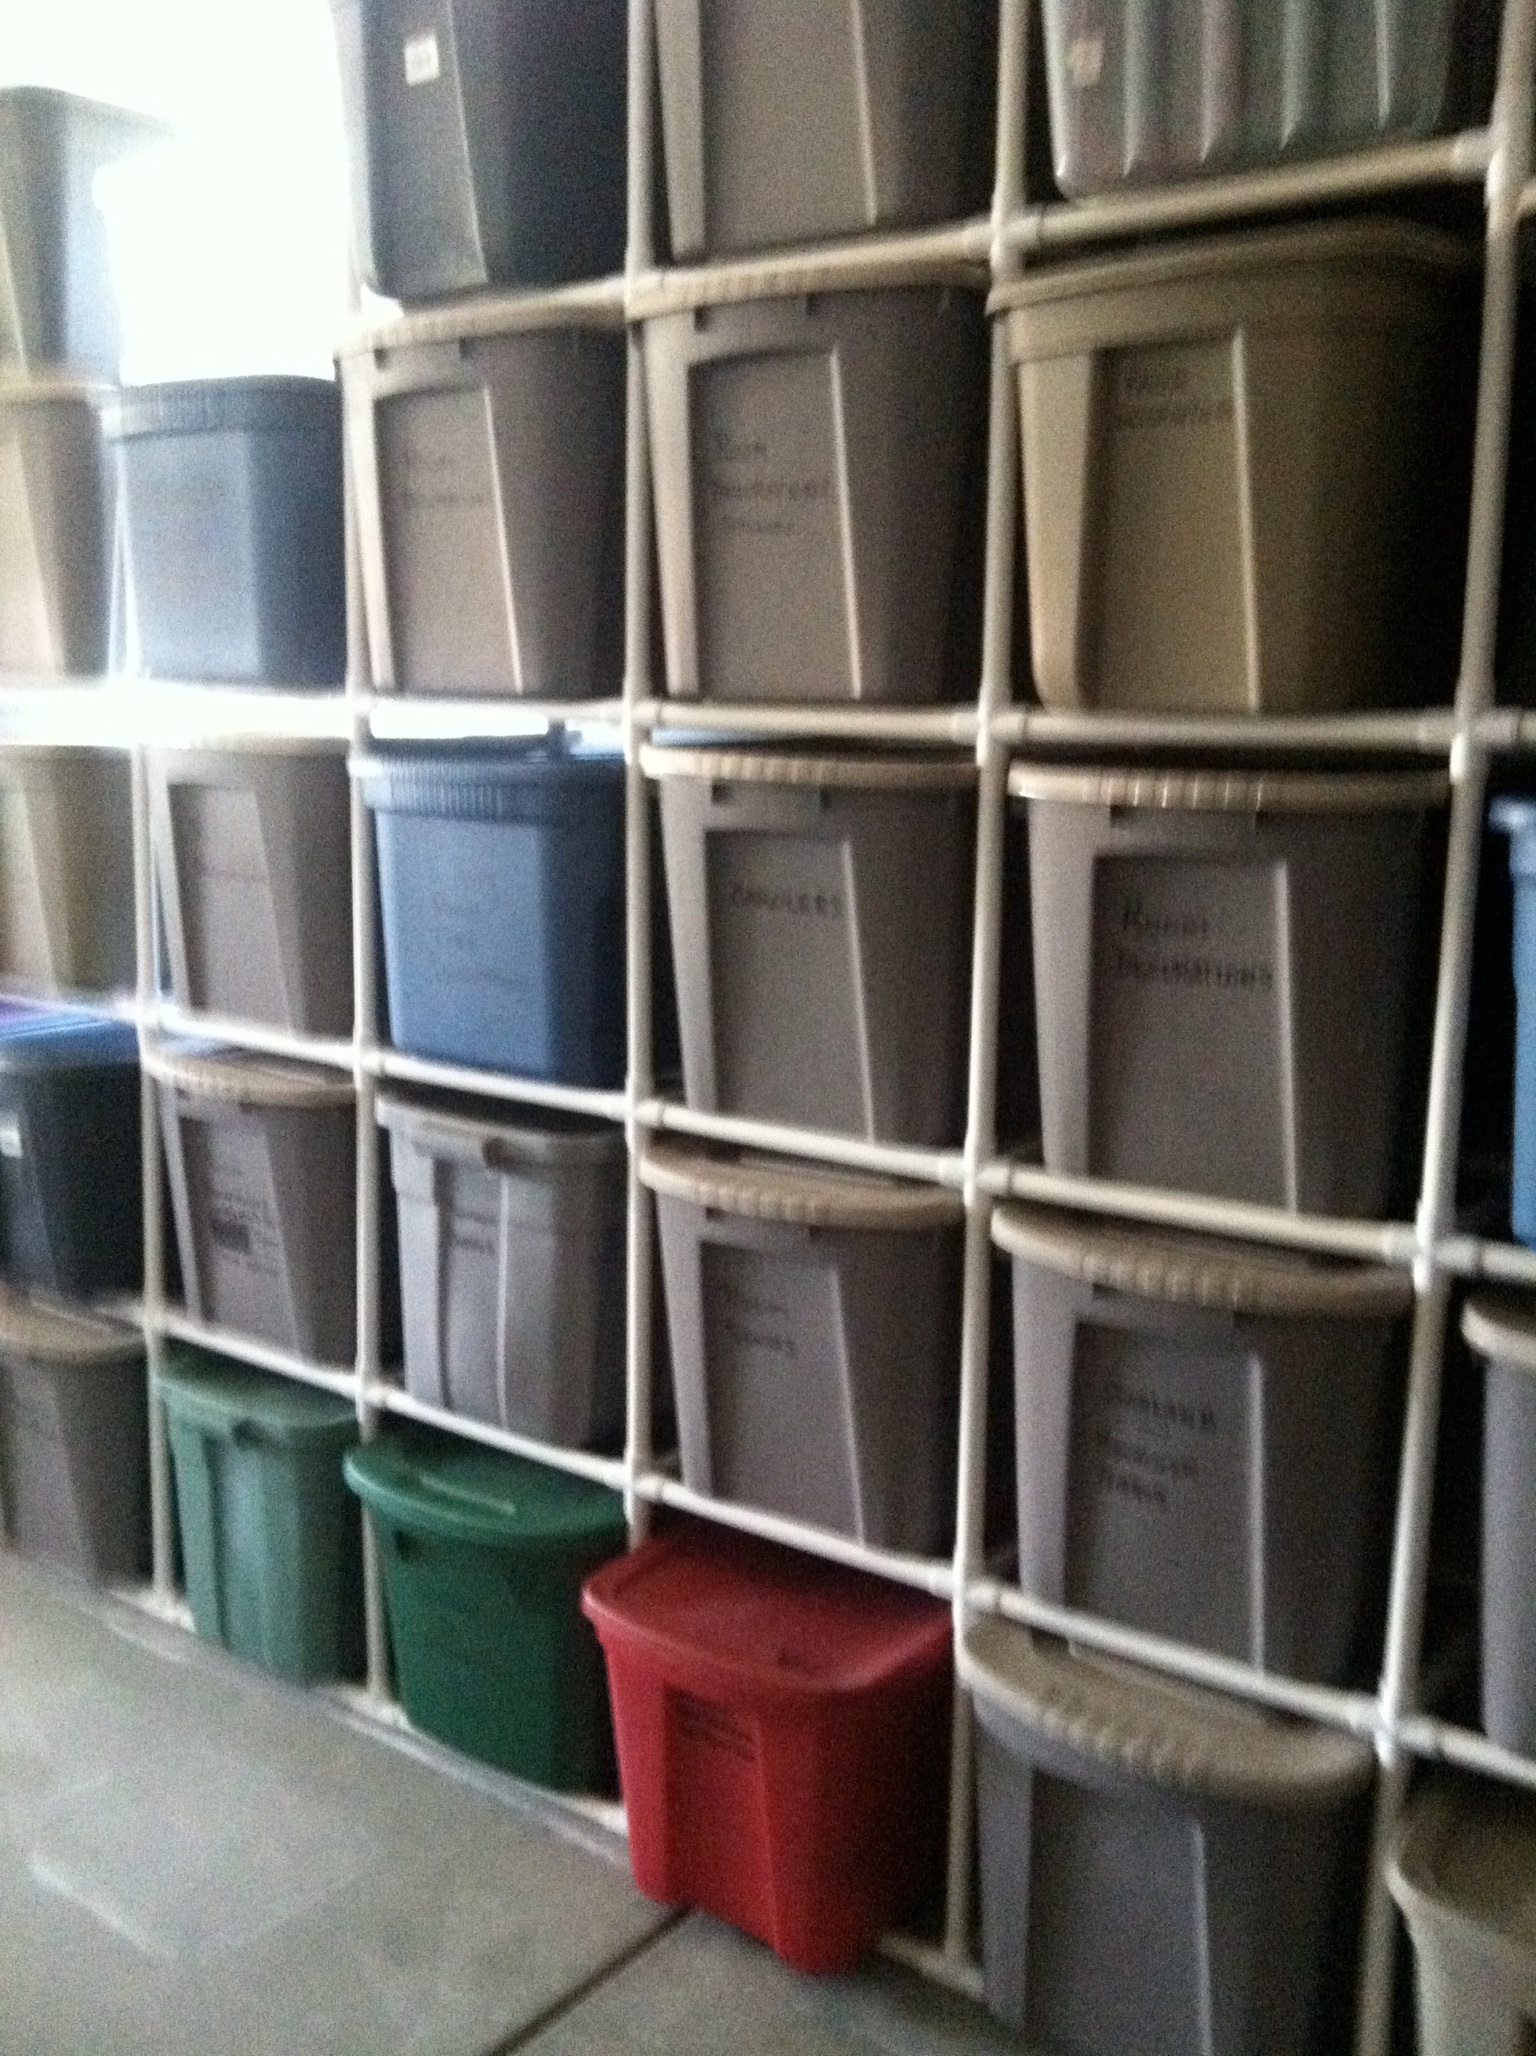
These did the trick. I’m sure by looking at them, you can see how and where they would be used. And, the wonderful thing about this PVC project is that you don’t have to glue anything. Everything snaps into place, but it can be taken apart if you want to adjust your bins or take it with you when you move. And because we only had two sizes to cut of the PVC pipe (17″ and 13″), hubby was able to cut it all at once with a chop saw, and then we could just assemble. The assembly went VERY fast. Here is a picture of the finished product:
Now we did one last thing. We had originally written on the totes what was inside using permanent marker. And, sometimes we changed what was inside so that meant we had to scratch it out and write something new. I wanted everything to look as neat and consistent as possible. So, first we took some elbow grease…okay…a LOT of elbow grease… and scrubbed off the markings. (Note: Even permanent marker can be removed. You can Google “how to remove permanent marker from plastic totes’ for hints on how to do this.)
Then, we attached some adhesive pocket sleeves on the front of each tote. I found these at Gaylord Brothers (www.gaylord.com).
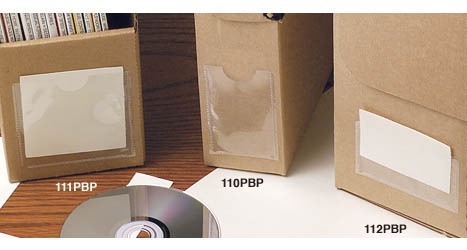
The ones I selected were 2″ high by 3-1/2″ wide and were about $23.00 for 250 of them. This was much cheaper than any of the file drawer labels or brackets that I found.
Using my label maker and some 3 X 5 file cards cut to fit the sleeve, I labeled each tote. To be sure that these sleeves line up, I measured from the bottom of the tote. When you have different size totes like we have, the top will be at various heights. But the bottom will always be the same. And the best part…if I need to relabel what’s in a tote, I can just change out the card.
Here is some pictures of the finished product:
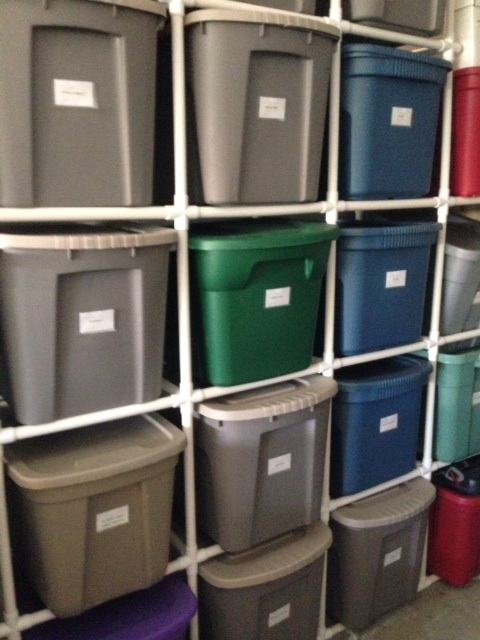
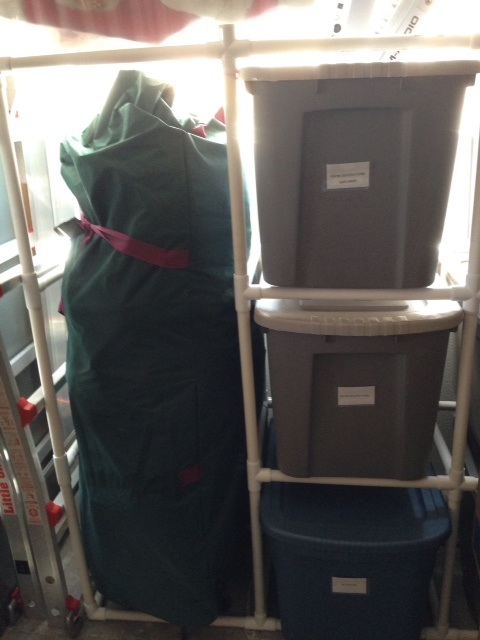
As you can see, we actually adjusted one column of cubes to accommodate one of our Christmas trees. Originally, we had planned for this to go horizontally, but the cubes on top of it started bowing. Once we changed it to a vertical set-up, it worked perfectly. That’s what so wonderful about this system. You can take it apart and adjust it as needed.
I hope I’ve inspired you to organize some of your totes. Thanks for visiting my first DIY Saturday project.

I love this! Showing Mike. We need to do this!
Thanks, Michele. If you and Mike want to come over and check it out, give us a call. We are really proud of how it turned out.
I am trying to build this. I am having trouble calculating how many of each connector i need to order. I would like to have 6 cubes across and 5 cubes high. Can you give me a little guidance on the easiest way to calculate this. I tried drawing a diagram, but ended up frustrated as i am not an artist and spent more time trying to draw cubes and label each corner. Any help you could you can offer would be greatly appreciated. Thanks!
Pingback: 10 Christmas Storage Ideas |
You could always use zip lock bags or page protectors taped to the bins to hold your contents. They are available everywhere.
Great idea, Betty! I never thought about that.
I use a label maker, then tape over it with Scotch tape to make it stick.
I read somewhere that you could also use dry erase markers and then just water and a paper towel will remove that for relabeling.
Another good suggestion. I’m a little OCD (okay…a lot OCD). I wanted a uniform, neat lookbut it’s totally optional.
Reblogged this on Being Womanly and commented:
This past Christmas was the first time we really got to take advantage of our PVC Tote Storage Organizer…and it works perfectly. No more did we have to move a bunch of totes to get to the one we needed. Yes, we still go crazy when decorating the house for the holidays. But, both the decorating and un-decorating took less time. And…it all looks so nice when it’s put away.
What was the total cost on this project?
Hi Tyler, as I mentioned in the article, it cost a almost $500 to do the entire project. That made 52 cubes as described plus two larger rectangular sections that were open to accommodate larger items like the Christmas tree. Cost for the actual PVC pipe was about $90 for the entire project. The major cost was in the connectors and they cost a few dollars each. However, we calculated that the wood to build something similar would have cost about the same. However, it would have been more labor intensive and not portable at all. And, one would need some carpentry experience.
How does 3/4 inch PVC pipe hold up against heavy totes?
Quite well. Many of our Christmas decorations are quite heavy. However, we do put those totes at the bottom of the rack for a couple of reason. One is that it provides a good base for the entire structure. The other reason is that is seems safer when removing the tote. You don’t want to risk a heavy tote to come crashing down on your head.
Where in this configuration do you use the 5 way connector
It would be at the edge…where it would connect with one pipe up, one pipe down, one pipe right, one pipe left, and one pipe in.
Hi Kelsey, so happy I ran across your post on Pinterest. I just have a question. Do you think the regular PVC pipe would be okay to use or must you use the furniture grade?
Thank you.
We used regular 3/4 inch PVC pipe. It wasn’t furniture grade at all. Honestly, I didn’t even know that existed.
Thanks for the quick reply. I’ve only found the 5 ft lengths in the furniture grade, and it’s a bit more expensive (especially at the big name stores like Lowes & HD) 10ft of regular is $2.03 vs $6.43 for 5 ft of furn. grade at HD. I did find a place that sells the 5 ft furn grade for $2.03 at PVCfittingsOnline.com.
Thanks again for posting the tutorial.
See my reply below.
Hi! Questions please.
What size storage bins did you use? They look like 18 gallon bins?
If all goes according to plan, will I be able to extend it horizontally? And an additional column or two?
How is the unit holding up?
Thanks for your help.
I believe I mentioned that they were 18 gallons. It’s holding up great and it’s been several years. Occasionally, we have to re-insert some of the pipe because it will work it’s way out. As for making it wider, I can only guess that it should work. Good luck!! You will love how organized everything is.
Hi. We purchased the PVC pipe at Lowes and they have 12 ft lengths. Home Depot has them as well. It’s that type of store which will carry the PVC pipe for affordable options.
Just to add some info, regular grade PVC is called Schedule 40. Sch 40 works great for just about everything. Whatever schedule you decide, be sure the fitting are the same schedule.
Thanks for the info. I guess it just goes to prove that this can be done by an inexperienced DIY-er.
Very true.
Hey to add a quick question, Im building this right now and I noticed there is no central bar for depth to allow the totes to slide across on to reach the back cross beam. do they just slide across the top of the tote bellow it till it reach the back side against wall?
Pretty much. A center bar isn’t needed. The box should rest on the front and back cross bars.
Thank you for the visual display of this project really helpful.
My husband and I are working on getting materials for this project. We went to our local habitat for humanity store and found they have a bunch of connectors in their plumming section! We paid $1.74 for our 3 sided connectors we were bummed we couldn’t find some of the others there but ever store has a different selection!
What a great suggestion. I didn’t know that Habitat for Humanity has a store.
I am getting ready to assemble my storage tower, started out just using the tees because Lowe’s doesn’t carry the 4 & 5-way connectors, but it was very frustrating and I couldn’t go any more than two shelves high with it resembling a NYC power grid! So after waiting a few days, my online order arrived, and I’m almost finished. Also, to label my totes, I found 100 sealing jewelry baggies in the craft section for $2, attaching these with box tape, and a 3×5 note card doors right in :-), will update after I finish. Thanks for helping me save my basement! My clutter has accumulated about knee deep and scattered, this is a great way for me to organize it along the wall, and the beauty of it is, NO heavy lifting, and VERY customizable. I can totally manage this DIY all by myself:-D
I’m so very glad you were successful. It is definitely easy to do but the connectors can be expensive.
after another frustrating year of rearranging boxes, I showed this t my hubby and he actually started looking up supplies and prices. I am so excited. he wants to go with 1″ pipes Can I ask where you were able to find the connectors?
Unfortunately, my husband and I don’t remember where we actually purchased them. I googled and found them online. As I say in the blog, most of these connectors cannot be found at Home Depot or Lowe’s
Pingback: 25+ PVC Projects for Your Homestead - Mom with a PREP
Hi there,
I just found your post and I love the tote storage! Did you secure to your wall? I’m wondering if it’s sturdy without it being anchored because my basement is unfinished. Thanks!
Hi Lindsay,
Securing to the wall would be a good thing. Alas, we haven’t done it yet and we live in S. California, aka Earthquake country. We keeping meaning to do it, but haven’t. We have had a couple of temblors and it withstood them just fine. However, if the ‘big one’ hits anytime soon, I’m pretty sure things will come tumbling down. Thanks for the reminder that we need to take care of this.
Hi Kelsey,
Thanks so much for the quick reply. It’s honestly the response I was hoping for because they’d be going in our basement without drywall. Its very reassuring to me that they’ve been perfectly fine for almost 3 years. Thanks again.
Hi, I love this idea. My suggestion to save money is to use sandwich baggies taped to the side that you want to put your label on and use 3×5 index card, which slides right inside. Also, you can write on both sides and flip as needed.
So where did you get the connectors
Honestly, I don’t remember as we built this a few years ago. We did purchase them online. I googled PVC connectors and that’s how we found them.
Did you screw these together or add doweling inside the joints to make them stronger? Are the glued?
They are not screwed together, glued, nor are there any dowels inside. The connectors are designed to hold each section of pipe together. It’s perfectly sturdy. AND, as mentioned in the full article, it can be disassembled so that the cubes can be rearranged as needed or moved.
Where did you end up getting your connectors online??
Since it’s been a few years, I don’t remember where I got them. I just Googled PVC connectors.
Where are the instructions for this storage unit?
Read the post. It explains everything the best way I can.
Pingback: 15 Basement Storage and Organization Ideas | Decor-Family
Thank you for sharing how you did this as I now know that even alone with disabilities I can create affordable storage in an apartment that barely offers any. WooHoo and Yippie : – )
A P.S. idea for others who need to hang items such as clothes. To prevent your PVC from bowing under the weight simply slip a metal rod inside the pipe to match the PVC length. Tah Dah! See how you inspired me with your post : – )
Pingback: Great attic storage ideas - LIFE, CREATIVELY ORGANIZED
Awesome post… Love the time you took to explain in detail; thank you!
If there is no center support under the tote, just back and front, doesn’t the tote teeter-totter as soon as it leaves the back support? Also, I’ve tried to use 6’ lengths of regular pvc as a curtain rod and it bowed under the weight of the drapes. How do you keep the pipe from bowing?
Thanks.
Yes, it does teeter totter slightly when it leaves the back support. The worst that happens is that it rests on the tote below…or the floor if it’s the bottom tote. But, it’s only for a second or two if that. The rest of it slides right out. The pipe isn’t in 6 foot lengths. It is in 17 inch lengths and then it is within a frame of more pipe. Look at the diagram. There are basically cubes which share side bars all around. I did address the issue of one section which doubled the side of one cube going across. That did bow so I instead had the cube doubled going up. That solved the problem.
Pingback: 10 DIY Basement Organization Ideas- A Cultivated Nest
Pingback: Construct Personalized DIY Storage Cabinets on a Price range - Home Harmony Now